Dreadlocks are a trendy hairstyle that individuals of all cultures and backgrounds have adopted. If you have naturally textured hair and want to try dreadlocks, the 3 strand twist method is one option. Individual dreadlocks are created by sectioning your hair into three strands and twisting them together. This blog post will walk you through the steps of creating 3 strand-twist dreadlocks on natural hair. We will provide step-by-step instructions as well as helpful hints to ensure a satisfactory outcome.
What is a 3 Strand Twist?
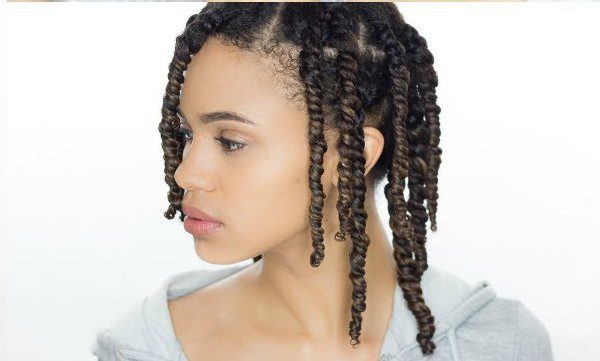
Three-strand twists are well-known for natural hair styling. Instead of braiding, three strands of hair are wrapped around each other to create a spiral curled effect. When compared to the typical 2-strand twist, it has a different appearance. The three-strand twist can also be used to make three-strand twist dreads, which is a distinctive, textured hairdo choice.
The ultimate effect of a 2 strand twist differs noticeably from that of a 3 strand twist. These distinctions are visible in the general texture and pattern of the hair.
What are the Differences Between a 3-Strand Twist and a 2-Strand Twist Dreadlocks?
2 Strand Twist Dreadlocks:
Two-strand twists have become increasingly popular among hair types and textures. This technique involves taking two sections of hair and twisting them around each other to create a spiral curl pattern.
- 2 strand twists generally require less time to complete compared to three-strand twists.
- 2 strand twists tend to provide more volume to the hair, resulting in a fuller appearance.
- With 2-strand twists, it’s common to experience more frizz due to the nature of the twisting technique.
- The roots of 2-strand twists tend to have a tighter grip, meaning they start with less looseness or slack.
3 Strand Twist Dreadlocks:
Three-strand twists offer a variation to the traditional twist-out style. This technique involves wrapping three strands of hair around each other to create a spiral pattern.
- 3 strand twists typically require more time to complete compared to 2-strand twists.
- It can be initially confusing to differentiate between a three-strand twist and a braid. It’s important to remember to create a twist rather than a braid.
- Starting the three-strand twist as a braid at the root can help prevent the twist from being too loose.
- 3 strand twists offer more hair definition than a traditional twist-out style, resulting in more defined curls.
- 3 strand twists generally produce less frizz than two-strand twists, providing a smoother overall appearance.
- Three-strand twists often create tighter curls compared to two-strand twists.
Ultimately, the choice between two- and three-strand twists depends on the desired outcome. Three-strand twists may be better if you prefer reduced frizz and enhanced definition. And, if you like loose curls, don’t mind frizz, and want to save time, two-strand twists are suitable.
Step-by-Step Guide to 3-Strand Twisting Your Natural Hair
If you’re new to this technique or want to refine your skills, this step-by-step guide will walk you through the process of 3 strands twisting your natural hair.
Step 1: Section Hair
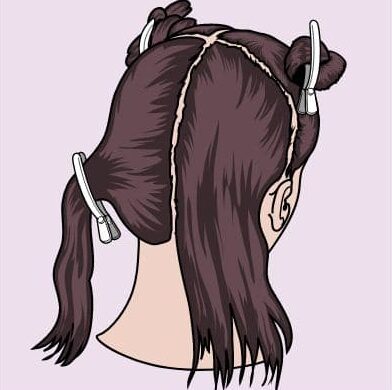
Start with freshly cleaned hair for the best results. Use a spray bottle with water to keep your hair moist if it becomes dry or begins to dry during the process.
To begin, section your hair with a wide-tooth comb. Depending on the thickness and preference of your hair, the number of portions may change. For easier handling and greater control, four teams are frequently utilized.
Make three equal strands from each region of hair. To keep track of the strands as you twist, mentally identify them as hair strand 1, hair strand 2, and hair strand 3.
Now, using a wide-tooth comb, gently detangle your hair. Begin detangling at the bottom of the hair as you work your way up toward the roots. This bottom-up approach minimizes the risk of tearing and knots in the hair.
Proper sectioning and detangling of the hair at the beginning of the process sets a solid foundation for creating well-formed and neat twists.
Step 2: Apply Oil to the Scalp
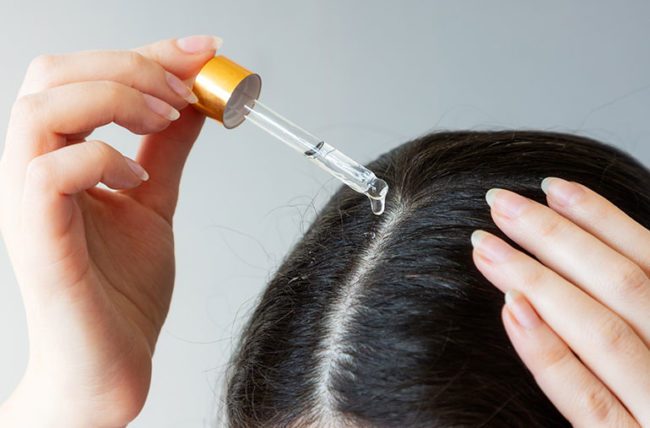
Apply a small amount of hair oil to your fingertips or palm, then use your index finger to gently massage the oil onto your scalp in the sectioned area.
Make sure the oil is distributed evenly across the scalp.
Choose one section from the previously separated sections and unfasten it from the clamp or hair tie. Within the selected section, we further divided it into smaller subsections.
Step 3: Start Twisting Your Hair
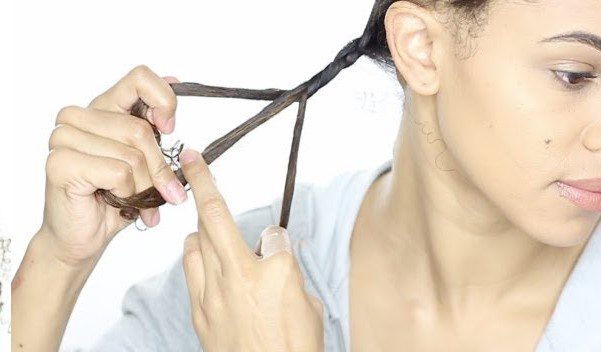
Identify strands 1, 2, and 3 in your hair. Next, cross hair strands 2 and 1 over 3 hair strands. Strings 3 and 1 are crossed in the crosshairs.
Focus on weaving just the base of the segment of hair rather than the complete braid. It’s time to twist after the base has been braided.
Start by bringing the hair strand that is furthest to the right side over to the left. Pulling the hair from the left side to the right side, repeat this motion for every strand. Pull the hair strands left to right repeatedly until the twist is formed.
It’s necessary to exercise caution because occasionally muscle memory may result in hair braiding rather than a twist.
Step 4: Secure your hair end
To complete the entire head, continue following Steps 2-4.
As you get closer to the ends of your hair, you may notice that the strands have thinned. Divide your hair into two sections and twist it like a conventional two-strand twist in this example.
Apply a small quantity of gel to the ends of your hair to prevent unraveling. Twist the ends gently to keep the twists in place.
Allow the style to air dry naturally once you’ve finished twisting your entire head. Excessive heat or hair dryers, which can induce frizz and disturb the twist pattern, should be avoided.
The 3-Strand Twist haircut lasts four weeks with proper upkeep. To ensure the lifetime of your style, hydrate your hair regularly, sleep with a satin or silk scarf or hat, and prevent excessive manipulation.
How to Create a Twist-and-Curl Hairstyle
To create a stunning twist-and-curl hairstyle, follow these simple steps:
- Start with freshly washed and conditioned hair. Clean and moisturized hair provides an excellent foundation for styling.
- Apply a leave-in conditioner or moisturizer to your hair to stay hydrated and promote defined curls.
- Divide your hair into sections based on your desired style and the thickness of the twists. This will make the styling process more manageable.
- Take each section and twist it using your preferred twist method. You can opt for two-strand twists, three-strand twists, or any other technique that suits your hair type and desired look.
- Once all the twists are complete, apply a curl-enhancing product. This will help define and enhance the curls when the twists are unraveled.
- Allow the twists to air dry completely. You can let your hair air dry naturally or use a diffuser attachment on low heat to speed up the drying process.
- Gently undo the twists, revealing beautifully defined curls at the ends of each twist. Take your time to unravel them to avoid frizz or disrupting the curl pattern.
- Style and shape the curls using your fingers or a wide-tooth comb. You can separate the circles for more volume or gently fluff them for a fuller look.
- Set it with a lightweight hair gel or styling product to ensure the style lasts. This will provide hold and definition to your curls without weighing them down.
Experiment with different authentic products and techniques to find what works best for your hair type and personal style.
Wrapping Up
With this step-by-step guide, you have the knowledge and confidence to 3 strands twist your natural hair into three strands. This versatile and protective style lets you showcase your curls while keeping your hair healthy and manageable. So, grab your favorite styling products and embrace the beauty of 3 strand twists!
Frequently Asked Questions
Are strand twists suitable for all hair types?
Yes, strand twists can be achieved on various hair types, including straight, wavy, curly, and coily textures. However, the twists’ thickness, size, and overall look may vary depending on the hair type.
How long do strand twists typically last?
The duration of strand twists varies depending on hair type, maintenance, and personal preference. Generally, strand twists can last anywhere from one to four weeks. However, it’s important to note that proper care and maintenance can help prolong their lifespan.
Do I need to use products to maintain strand twists?
Using hair products is not mandatory for maintaining strand twists, but they can enhance the overall appearance and longevity of the style. Moisturizing products, leave-in conditioners, and lightweight oils can help keep the hair hydrated and minimize frizz.
Can I wash my hair with strand twists installed?
Yes, you can wash your hair with strand twists installed. However, it’s essential to be gentle during washing to avoid causing frizz or unraveling the twists. Diluting shampoo in water or using a co-washing method can help maintain the integrity of the twists while still cleansing the scalp.
How do I prevent frizz in strand twists?
To minimize frizz in strand twists, it’s essential to follow a few key practices:
- Avoid excessive manipulation or touching of the twists.
- Sleep with a satin bonnet or pillowcase to reduce friction and prevent moisture loss.
- Apply a small amount of oil or moisturizer to the twists regularly to seal in moisture.
- Avoid using heavy products or oils that can weigh down the twists and cause them to frizz.
Can I exercise or swim with strand twists?
Yes! you can engage in physical activities and even swim with strand twists. However, taking precautions to protect the twists and maintain their appearance is essential. Wearing a swimming cap or using a protective hairstyle such as a bun or updo can help prevent the twists from getting wet or tangled. After swimming or exercising, rinse the hair with clean water and reapply any necessary styling products.
Can I style my strand twists in different ways?
Yes, strand twists offer versatility in terms of styling. You can create various updo styles, buns, half-up, and half-down styles, or even combine them with other protective hairstyles such as braids or cornrows. Additionally, you can unravel the twists to achieve twist-out or twist-and-curl hairstyles for a different look.
How can I remove strand twists without causing damage?
To remove strand twists without causing damage, follow these steps:
- Start by applying a moisturizing oil or conditioner to the twists to soften them.
- Gently unravel each twist, careful not to tug or pull on the hair.
- Use a wide-tooth comb or your fingers to detangle any knots or tangles.
- Once all the twists are undone, thoroughly cleanse and condition the hair to remove any product buildup or residue.